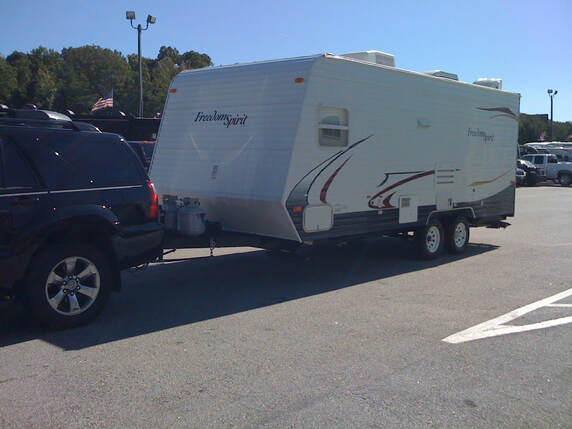
Hitching and Unhitching a Travel Trailer

HITCHING A TRAVEL TRAILER
- Raise stabilizers.
- Crank the tongue of the trailer jack up until the hitch coupler is high enough to clear the tow vehicle.
- Back the tow vehicle to the travel trailer until the hitch ball is directly under the coupler on the trailer. A second person is very helpful here to let you know when to stop. We usually use our cell phones instead of shouting at each other. Two way radios are also good to use.
- Set the parking brakes, raise the locking latch on the coupler and crank it down on the ball.
- Move the locking latch down to lock it on the ball.
- Engage the lock and the retainer clip.
- Raise the tongue by cranking the jack down. (The tow vehicle will come up with it if the high coupler is properly latched.)
- Cross and fasten safety chains to frame of tow vehicle. Do not fasten chains to any part of the hitch unless the hitch has holes or loops specifically for that purpose. Chains should be underneath hitch and couple with enough slack to permit turning and to hold tongue up, if the trailer comes loose. They should never drag the ground.
- Connect the breakaway switch, assuring the breakaway cable is not attached to any part of the tow vehicle hitch assembly.
- Crank the jack all the way up. The tow vehicle will come up with it if the high coupler is properly latched.
- Now attach the weight distribution hitch. The tongue should already be raised. This makes it easier to install the weight distribution spring bars.
- Insert one end of the spring bars into the hitch head.
- Lower the snap-up bracket (saddle) and place the proper chain link onto the hook. We use 4th from the end, leaving 3 hanging. Be sure the hanging links are loose and not caught in the saddle.
- Using your pipe, raise saddle back up to its normal position and secure it with a safety clip.
- Repeat for spring bar on the other side.
- Now attach the sway bar. The tongue should still be raised.
- Attach to the hitch ball and secure by cotter pins.
- Tighten the sleeve against the bar.
- The sway bar should be tight, but not too tight. If the sway bar makes grinding noises during travel try to loosen the bar one turn.
- Retract the tongue jack to all sufficient clearance between it and the road.
- Plug the travel trailer electrical cord into the receptacle on the tow vehicle.
- Remember to remove the boards on the ground where the tongue jack was sitting.
- Remove chocks and store properly.
CHECKLIST (See complete departure checklist)
- Check all lights. A second person is handy and again we use our cell phones.
- Check brake controller for proper connection.
- Check that TV antenna is down and in the correct position or satellite dish is removed.
- Check that all park connections are disconnected; water, electricity, cable.
- Check that all windows, doors and steps are closed and secured properly.
- Check that chocks have been removed.
- Walk around the entire travel trailer to be sure everything is secured properly.
- Look at your campsite to be sure it is clean and you are ready to travel.
UNHITCHING A TRAVEL TRAILER
- Choose a level site.
- Before uncoupling, level the trailer from side to side with suitable lengths of 2" x 6" wood blocks under the trailer wheels. Place the wood blocks on the ground forward of the wheels, and to the trailer onto the blocks.
- Chock the wheels
- Disconnect the electrical cord from the tow vehicle
- Disconnect the safety chins
- Disconnect the breakaway cable
- Raise the tongue high enough to take most of the weight off of the spring are.
- Remove the sway bar. Put safety clips in sway bar so you don't loose them
- Remove the safety clips from the snap-up brackets
- Lower the bracket using the lever pipe and release the chain. CAUTION - if there is too much weight still on the spring bars, it could cause the lever to jerk out of your hands.
- Lower the trailer tongue to put weight on the hitch ball
- Unlock and release the coupler latch mechanism
- Raise the trailer tongue until the coupler is clear of the hitch ball
- Drive the tow vehicle forward away from the trailer tongue.
- Level the front and rear of the trailer using the tongue jack
- Lower the stabilizing jacks
- Begin set-up process using our Arrival Checklist
“It is good to have an end to journey toward; but it is the journey that matters, in the end.”
― Ernest Hemingway
― Ernest Hemingway
HTML Comment Box is loading comments...
